
How To Stamp Concrete
After you have set-up your forms, then you are ready to go through the steps of how to stamp concrete. If you would like directions on concrete set-up, go through the steps on diy concrete and then come back here after step #5.
The directions below are for a seamless pattern (no grout lines). Patterned stamping is more difficult because you have to follow a specific pattern and there is not as much room for error. Therefore, if you have never stamped before, we recommend using a seamless pattern.
Step #1
If you didn't do this during the set-up, make sure that the stakes are either flush with or below the forms so that when you stamp there are no obstructions on the edges of your concrete.
Step #2
Mask the area to protect structures such as siding and other masonry work from the powdered colors or splattered concrete. Use plastic poly to cover these items.
Step #3
Order the concrete. For specific instructions on what to order seeconcrete delivery. Tell your ready mix supplier that you will need a stamp mix. Your supplier will also have a resource for colors that you may want to add directly to the base mix.
Also, in order to avoid potential problems, you may want to have some admixtures on hand. Click concrete mix to find out what items you may need on hand.
Step #4
Pour the concrete. For specific instructions on pouring see pouring concrete. Come back here to learn the rest of the stamping steps once you are done.
Step #5
If you decided to add accent colors in, it is time to broadcast or (throw) those color hardeners onto the surface of the wet concrete.
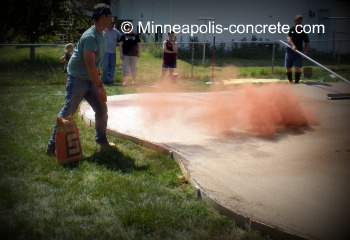
Try to broadcast the colors evenly so that there are no clumps. This is where your personal creativity comes into play. You can make the concrete very colorful by broadcasting several colors.
Step #6
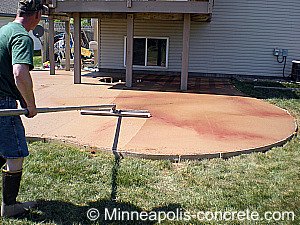
Bow float the color into the concrete. Don't overwork it, or your powdered color hardener will start to lighten and blend into the mix.
Step #7
Finish the concrete. See concrete finishing and do steps 1-3. Do not do step #4 which is to broom finish the concrete. Instead of broom finishing, come back here for the stamping steps.
Step #8
If you like the deeper look of wet cuts - install those at this time.
Step #9
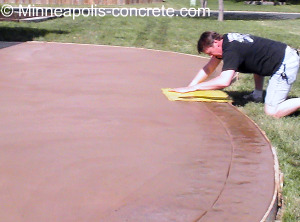
Stamp the edges ahead of the regular stamps with the small floppy stamp.
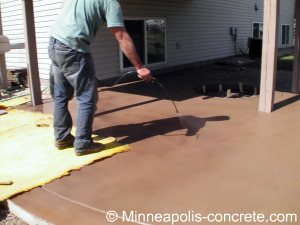
Use either a liquid or powdered release and broadcast the powder on the concrete you will stamp first as well as the stamps you will use first. If you use a liquid release, spray the stamps and the concrete with the liquid release. We chose to use a liquid release, as it is not as messy as the powder.
Use the floppy to stamp the edges. Use your hands, but if you are not getting a nice impression, use a tamper.
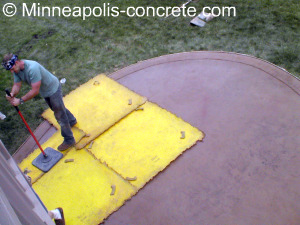
Step #10
Spray the large, rigid stamps and place them on the inside of the border you just stamped. Put pressure on the stamp by stepping on it and tamping the stamps. Be careful not to step or tamp too close to the edges of the stamps or you will get an especially deep impression.

Step #11
Make sure you have enough stamps to cover the shortest distance across your slab. Repeat step #10 by picking up the stamps that are behind you and placing them in front of the stamp you are standing on. Work your way across the entire slab.
Step #12
Wash your stamps off with soapy water and a scrub brush.
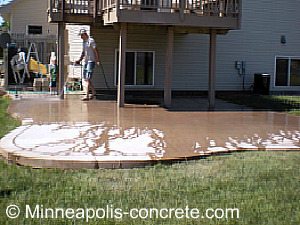
Step #13
Wait 24 hours for the concrete to cure and then take a garden hose and wash the release off of the slab.
Step #14
Wait for the concrete to dry completely and seal the concrete.
Do the steps for how to stamp concrete sound too complicated? If so, and you live in the Minneapolis and surrounding suburbs area, request a quote on your project.
Return from How To Stamp Concrete to Stamped Concrete Designs
Return from How To Stamp Concrete to Minneapolis Concrete Home

License # BC721668
New! Comments
Have your say about what you just read! Leave me a comment in the box below.