612-470-8575
Concrete Forms Set-Up
Steps to set-up a square, 4 inch-thick, patio with concrete forms. Below these steps, find advice for setting up different shaped designs.
Materials Needed:
- Four 2X4s (the size of the patio determines the length of the 2X4s needed)
- Wood or Metal Stakes - As many as needed to make the forms stable. Fill sand or gravel may be used if you run out of stakes, but make sure there are some stakes on each side.
- 8 Penny Doublehead Nails or Drywall Screws
- Four Foot Level or a Laser Level
- String Line
- Hammer
- Tape Measure (2 are needed)
- Sledgehammer (Maul)
Step #1
Plan the patio’s dimensions as well as the diagonal so the slab is square. For example, for a 10X10 patio, all sides are 10 feet and the diagonal across equals 14.1. (Use pythagorean’s theorem a2+b2=c2)
Step #2
Place a stake in one corner and use the sledgehammer to pound it into the ground.
Step #3
Hook the top of one tape measure to the stake and pull it to the next corner the length of that side. Pound a second stake into the ground in this corner.
Step #4
Using the tape measure, hook it to the first stake pounded in and pull diagonal across to the corner where the third stake will be placed. Lay the tape measure down.
Step #5
Use the second tape measure to pull the measurement of the second side from the second stake to where the third will be placed. Pick up both tape measures. Where they intersect is where your 3rd stake will go. This creates 90 degree angles.
Step #6
Pull one tape measure from the first stake to where the 4th stake will go, and pull the 2nd tape measure from the third stake to where the 4th stake will go. Where the two tape measures intersect is the placement of the 4th stake.

Step #7
Check that both diagonals (from corners 1 to 3 and 2 to 4) are equal.
Step #8
Establish the height you want your patio on the stakes.
To control the flow of water, slope the patio in such a way as to allow for drainage away from any structure. Drop 1/4 inch per foot on the side that drains off water. For example, for an 8X8 patio, each side is 8 feet. Therefore, drop the string line 2 inches (8 X 1/4 inch) on the side that you want to drain off water.
Mark out your stakes. Account for the slope.
Step #9
Tightly pull the string line around all four stakes where marked and secure by wrapping the string around the final stake. This string is the guide that will ensure the concrete forms are straight.
Step #10
Match the 2X4 forms up to the outside of the string line (the string will be on the inside where you pour the concrete). Use the maul and pound new stakes behind the form starting at each end of the 2X4. Include at least one stake each 6 feet so the concrete will not bow the form out.
Step #11
Raise the forms off the ground and nail them to the stakes to make sure they are flush with the string line. Don't worry about the forms being lifted off of the ground. You will build up the ground during the final grade. Here is a picture of what the forms look like raised up off of the ground and secured with the stakes:
Step #12
Check your work. Use the level to make sure all your heights are correct. Take the string line down.
Alternative Designs Concrete Forms Set-Up
Advice for Different Designs:
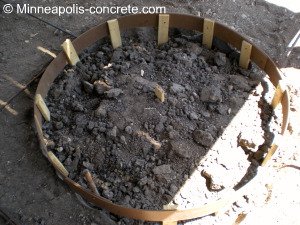
- For a circular patio: Use masonite siding for your forms. Measure the diameter, find the center point by dividing this number in half (this is your radius), and place a stake in the center. Place stakes around the center by measuring the length of the radius several times and placing stakes until you have an even circle.
Picture of a circular sandbox in the middle of a patio which was set-up using the above procedure:
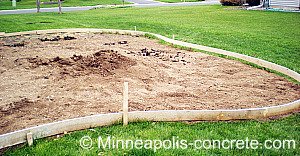
- Irregular shapes: To spark creativity, use a garden hose to create different-shaped perimeters of possible patios. Alternatively, spray paint the lawn until you find a shape you like. Then, set-up your forms accordingly. Use masonite siding.
Picture of a patio set-up using "S" shaped sides:
After setting up concrete forms, the next step in diy concrete is compacting the fill and making a final grade.
Would you rather not do it yourself? If so, and you live in the Minneapolis and surrounding suburbs area, request a quote on your concrete project.
License # BC721668


New! Comments
Have your say about what you just read! Leave me a comment in the box below.