612-470-8575
Building Concrete STeps
Common dimensions used for building concrete steps safely: (check with the building codes of your city to be certain)
- Individual riser height - also called "the rise" (the height of each individual step) = 7 inches
- Individual width height - also called "the run" or "treads" (the width of each individual step) = 10-12 inches
- Width of entire stairwell - 3 1/2 feet wide (preferably wider)
- Steps with a height of more than 5 feet should have a landing with at least a 3 ft. run.
- Footings - When your concrete steps attach to a building, you need concrete footings. In new construction, the footings for concrete steps are normally installed by the foundation contractor. If there isn't a foundation for the steps (such as in older homes), install 8-12 inch diameter sono tubes at the base of the stairway. Sono tubes should extend 4 ft below the frost level (if that applies to your location - check your local building codes).
Plan Your Dimensions
A. Figure the total rise - measure the height from the top of the stairs to the bottom of the stairs
B. Figure the number of stairs you will have - divide the total rise (answer from step A) by the individual rise you plan to use (typically 7 inches). Round this number off. This is the number of steps you will have.
C. Figure exact dimension of each individual rise - Divide total rise (answer from step A) by the number of steps (answer from step B).
D. Decide how deep you want each tread to be (individual run - typically 10-12 inches).
E. Figure the total run (where the stairway will end) - Multiply the individual run (step D) by the number of steps you have (step B).
Place expansion joint between the stairway and walk. - Slope 1/4 inch per running foot for the landing and 1/8 inch per foot for each tread to prevent rain and ice from pooling.
F. Purchase 3/4 inch plywood that is at least as long and wide as your stairs will be (Step A and Step E)
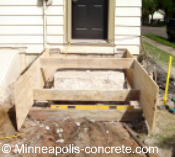
Building Concrete Step's Side Forms
C. Check the forms for proper slope and both sides are level to each other.
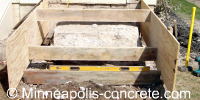
E. Nail or screw the forms to the stakes.
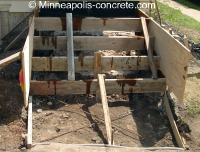
Make and Install the Step's Riser Forms
A. Cut 2 X __ lumber (will either be 2X6 or 2X8) to the correct width and length for your risers.
B. Using a circular saw, bevel (cut at a 45 degree angle) the outside bottom of each riser (except for the lowest riser). Leave 1/8 inch of each bottom un-beveled for strength. This bevel makes it easier to use trowels to finish the tread after the concrete is poured.
C. When building concrete steps, install the top riser first and work down. Use at least three, double-headed nails or screws to fasten them to the side forms.
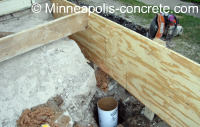
Reinforce the Forms
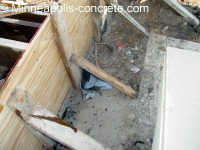
The weight of wet concrete exerts great pressure on the forms. When building concrete steps, support the forms at all points where it may bulge.
- Add more support stakes
- Make sure none of the support braces will get in the way when it is time to trowel the treads or landing
- If your stairs are wider than 4 feet, add a riser support (a kicker) near the center of the bottom form. Attach a 2X6 or 2X8 to a 2X4 stake driven deep into the ground at the center point.
- Add more kickers to the side forms and push the side forms in slightly, as the pressure from the concrete will bow them back out to the right position.
Pouring Concrete Steps
- Water the forms down, or buy form release so the concrete doesn't stick to the forms.
- When ordering concrete, make sure the slump is at least a 4. It should be stiffer than when pouring flat work.
- Pour the concrete from lowest riser to top.
- Tap the side forms with a hammer or use a concrete vibrator to keep the rocks from sticking out the sides of your steps.
Finishing Concrete Steps
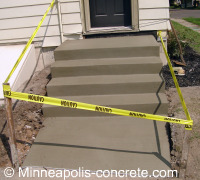
Pull the forms off only when concrete is firm enough so the corners don't fall, but don't wait too long because you need to magnesium float the sides and fill-in voids.
Concrete steps are one of the hardest concrete projects to finish. Make sure you have someone with concrete finishing experience help you.
If you're building concrete steps in the Minneapolis and surrounding suburbs area,
Home > DIY Concrete > Installing Concrete Expansion Joints > Building Concrete Steps
License # BC721668



New! Comments
Have your say about what you just read! Leave me a comment in the box below.